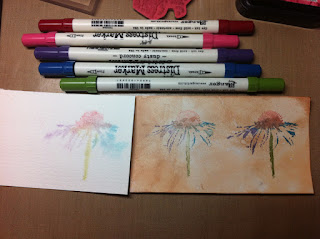
Day 6 was all about Distress Markers. The first technique was coloring with them.I'm not a big colorer. I usually find if I need to color I can use water colors or watercolor pencils and probably will not use this technique. But, I did like stamping with them and I used to do that a long time ago with some other water-based markers. Though I think I liked the watercolor technique used last week a lot. Stamped image with Archival ink and then 1st applied to dry paper, then wet paper. The advantage to me of Distress Markers is the color palette.
The 2nd technique was applying the pens to a stamp and stamping. One nice thing is that once you color up your stamp with the pens, just give a huff of breath on them and that will give you enough moisture for a stamping. I stamped three images -each lighter, obviously-with the one application of marker.
I did the two flowers on Specialty stamping paper- I'm not sure how much I like this paper but I'll see with other techniques. The foam blending pad does not move smoothly over the surface to me. I applied Distress ink with the blending tool after stamping the images I had colored with markers. You can also come back to the stamped image much later if you didn't get a chance to stamp it (phone rang), give it a big huff of breath and stamp away!
Day 7 was more interesting to me-Embossing Powders. I don't have any Distress Embossing powder but now that I know more about it, I think I'd like some. It has some larger crystals of another material that fall away leaving a distressed look if you rub after heat embossing. I think I will like that. Great, another thing to put on the wish list!
Nostalgic Batik is the 1st technique- I stamped the red image with Distress Ink Fired Brick. Dumped clear embossing powder over it, tapped it off and heat embossed. Next I applied different colors of Distress ink with blending tool. Then I stamped other images with Distress ink not Archival which would have left the image on the embossed part which I didn't want. I wanted a resist. I spritzed my hands with water and flicked it on the tag. I liked the result!
Rusted Enamel
I really like this technique, too. I covered all of the tag with Distress Ink- direct to paper from the ink pad- you want a lot of ink. Covered the tag with a lot of embossing powder, tapped it off and this time flicked the back of the tag instead of tapping only. * Unless doing this technique- you should tap the paper on it's side on the table only to leave plenty of powder on the inked piece. Something new I learned. But because for this you want some extra removed, flick it and then you can remove a little more with your fingers, too. I removed a bit too much but understood from this practice tag. Heat emboss. The go over with brown shades in Distress Ink with they blending tool. It does have a cool result I think.
All I had time for- the last technique calls for Distress EP because of that "fall away" it has for the result so couldn't' do that one.
I'm two days behind :(


